Last year, in February, I was diagnosised with Trigeminal Neuralgia and the month quickly went down hill from that...MRIs, Blood work, numerous trips to new doctors, having to leave my job, pain, exhaustion and then add a yahoo running into my car and having to also deal with insurance, repairs and rental cars for 2 weeks, then turning 40 in the middle of it...yes, last February....frankly...
So I am taking control of this February, and with God's grace am trying to be the opposite of last. As my DH said yesterday, "Merry, Merry February!!" INDEED! So, I had him pick out one of the sweets recipes I have pinned over on Pinterest for me to make. He actually said "um....all of them?" But we settled on this one first.
 |
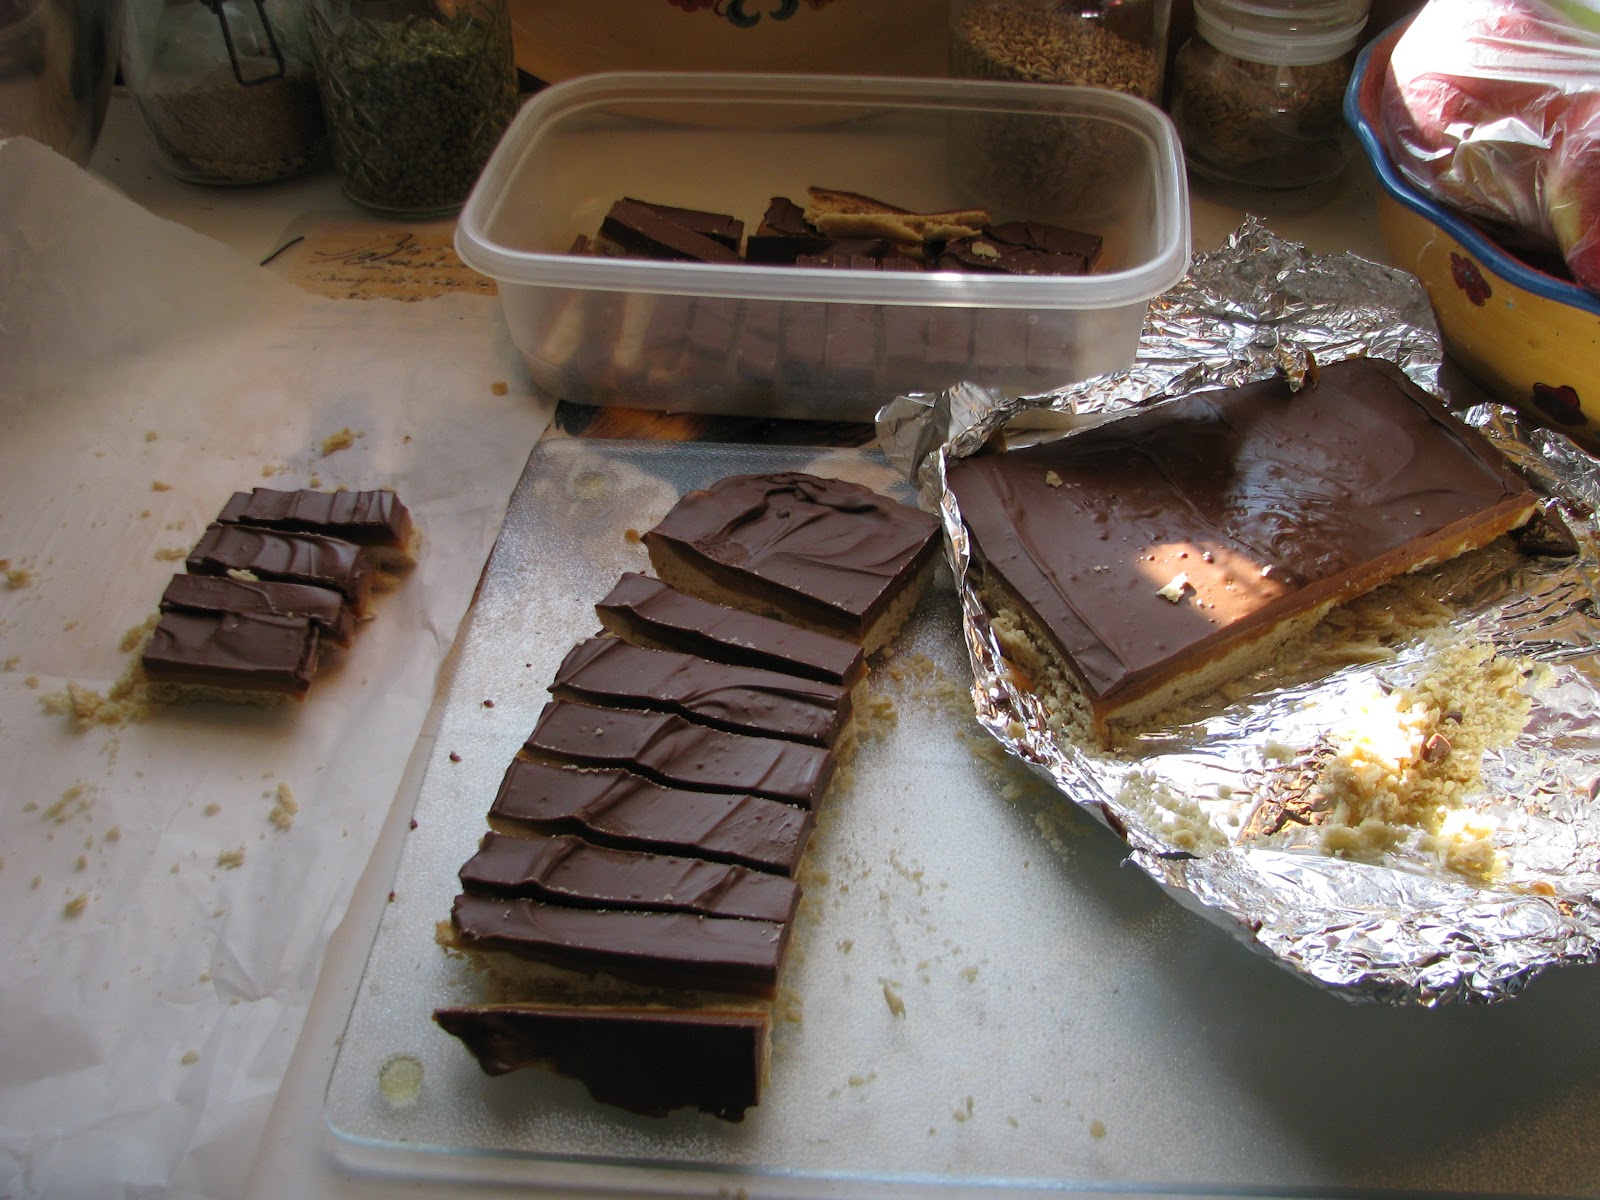
| This picture is from the website, not mine. Let's see how close I can get! But for you ReynBFF, because of your snarky comment, there is a collage just for you ;)  This recipe came from a Pin that I followed to the King Arthur Flour website. However, I used my milled white wheat flour. It is definitely delicious, however the cookie is terribly crumbly. IF I were to make it again, I would not use as much flour in the cookie. |

Shortbread layer
1 cup (2 sticks) salted butter, at room temperature
1 cup confectioners' sugar
2 teaspoons vanilla extract (I used the homemade stuff from Christmas!)
2 cups Flour
Caramel layer
2 cups caramel, cut into small chunks
3 tablespoons heavy cream
Chocolate layer
3 cups chopped milk chocolate or dark chocolate, melted
1 tablespoon vegetable shortening (optional)
Directions
1) FOR THE CRUST: Preheat your oven to 300°F. Spray a 9" x 13" pan lightly with cooking spray, or line with parchment, and set aside.
2) In a medium-sized bowl, beat together the butter, sugar and vanilla. Add the flour. At first the mixture may seem dry, but will come together as you continue to beat at medium speed.
3) Take the dough (it will be somewhat stiff) and press it evenly into the pan. Lightly flouring your fingertips will help with any sticking.

4) Prick the crust all over with a fork. The holes will allow steam to escape and the crust will bake evenly with fewer bubbles.
5) Bake the crust until it's lightly golden brown on top and the edges are deeper golden brown, about 35 to 45 minutes. Remove from the oven and immediately run a knife around the edges to loosen the crust. Set it aside to cool completely. I left it to the next day.....

6) FOR THE CARAMEL LAYER: Melt the caramel and cream over low heat in a small saucepan. Pour the caramel over the cooled crust and set in the refrigerator for 30 minutes to chill and firm up. Or for two hours while you read a new blog!

During this step I lamented that it would be nice to have an on-staff photographer like some bloggers have, and my darling hubby stepped up and took a bunch of pictures...he didn't listen when I said that I didn't want to be in them....only take pictures of the food! I love that he took pictures from way different angles than I do! And I love him....this was actually on our 19th anniversary.

After the carmel has been in the refrigerator, it becomes very glassy and pretty!

7) FOR THE CHOCOLATE LAYER: Melt the milk or dark chocolate slowly in a double boiler or over very low heat. If it seems very thick, add a tablespoon of shortening to thin it. Pour evenly over the chilled caramel layer and spread to cover all of the caramel. Return to the fridge until the chocolate is well set.

8) Cut into 2X2 squares, or long narrow strips, or whatever shape you like. I found the cookie crumbled WAY too much so for the most part were 1 inch by 2 inches. Best to use a BIG kitchen knife that is cold.
8) These bars can also be cut and dipped in milk chocolate to resemble Twix ® bars. After the caramel layer has chilled firm, cut down the length of the pan, splitting the bars into two long, narrow bars. Then cut each long strip into "fingers". Dip the chilled bars into melted chocolate and place on parchment paper to set for several hours.
But really, after almost 3 days of working on this project....this is as good as it gets!

Recipe summary
Hands-on time:
20 mins. to 30 mins.
Baking time:
35 mins. to 45 mins.
Total time:
2 hrs 5 mins. to 2 hrs 25 mins.
For me: Three Days!!!
Yield:
One 9" x 13" x 2" pan
AND then take a swig of Diet Citrus Drop and take a diabetes pill!
Oh, and find a cool site and airbrush a picture that your DH insisted on taking so you look like you have on make-up, no wrinkles, extra white teeth, and the background mess all faded! I'm just like the "Big Bloggers!"

4 comments:
Those look awesome!
I'm glad there is a pic of you here. (BTW, you don't have wrinkles, brat)
oooooooohhhhhhhhhhhhh
mmmmmmmmmmmmyyyyyyyyyyyy
gooooooooodnnnnneeeesssssss
!!!!!!!!!!!!!!!!!!!!!!!!!!!!!
that looks so deliciously heavenly!
Fantastic pictures! I'm glad there's pics of you in it too! You're so darn cute in your apron :-D I'm with u, Niki...what wrinkles?
Sheryl
That's the "great" part of being chubby...most of the wrinkles are filled in
Fact. I've seen her IRL. No wrinkles! These look divine. I think I'll try them with my spelt flour. Yum!
Post a Comment