Showing posts with label how-to. Show all posts

Sunday, August 24, 2014

Making Mozzarella

We've been milking for over a year now (I say "we" isn't that funny!?!) and the only cheese I've made so far is 'farm cheese' because it is so fast and easy.  I have read the recipe for Mozzarella about a zillion times, and each time decided that it sounded too hard...

Well, the time has finally come!  I am going to do it! 

Homemade Mozzarella

Gather your ingredients and supplies:
Gallon on milk (ours is raw whole milk, but you could use store milk too)
Measuring spoons.
1/4 Teaspoon of Citric Acid dissolved in 1/4 cup warm water
10 drops of liquid rennet in 1/4 cup warm water
Salt
Thermometer
Wooden Spoon, Slotted spoon
Gloves


Warm the milk up to about 88*-94*

Then add the citric acid, keep stirring.

It will start to separate.
Now add the rennet.


I keep stirring until the curds start to come together.
Then using a slotted spoon pull the curds out of the whey into another bowl.  
You could drain it through cheese cloth if you want.
I like to add a bit of salt to the curds.

Then you put the curds into the microwave for 30-60 seconds.  
This is the part I have always balked at, my grandma didn't have a microwave, but then I got over myself...
It'll look a bit like this.  

Then you have to knead it to get the whey out of the cheese.
At this point the smart thing to do is have gloves as the middle of the cheese is about 140*.  (And HOT!) and you need to knead it like bread. 

Knead and stretch.  If you can get it to stretch to about 12 inches you are done, but if not, put it in the microwave for another 30-60 seconds and do it again.  Keep draining off the water (milk).


Once it stretches, knead it into a ball and put it into icy cold salted water


Change the water once, then put it in the fridge to finish chilling.
Ta-Da!  See it's not as hard as I thought...
...and now getting brave enough to do Cheddar. (Now that will be a challenge!)

Oh, and then do all the dishes.  
A BIG thank you to my new resident photographer, Man, for helping me out!  It is so much easier to do tutorials when you have a "staff photographer!"

Sunday, May 18, 2014

Dandelions....

To continue onward with the "City Mouse"'s Canning Adventure, we then made Dandelion Jelly.  Honestly I thought I would absolutely adore the violet jelly and wondered about the results of the dandelion...I LOVED THE DANDELION more than the Violet!!!


Dandelion Jelly


1 quart tightly packed ripe yellow Dandelion flowers

6 cups water

6 cups sugar

2 Tbsp of Lemon Juice (or the juice of one lemon)

1 package Pectin


First, make sure your flowers have not been sprayed, pick and wash. remove the ends, and as much green as possible.


Place petals, water and lemon juice large heavy bottom pot, bring to a boil, then transfer to a bowl. Place a piece of waxed paper over top and refrigerate until morning.


Strain through a sieve, discarding petals


Return to pot, and sugar and bring to a hard boil. Stirring occasionally. Boil for 10 minutes.


Add pectin to the liquid and return to a boil for 5-10 minutes, until it begins to set.


Pour into hot sterile jars, and process in a hot water bath for 5 minutes.


It tastes a bit like honey

To keep the foam down, add 1/2 tablespoon of butter when you add pectin. It could take up to 2 weeks for jelly to set properly. If it doesn't set, makes a great syrup


Pictures courtesy of "City Mouse" (Except the picture OF City Mouse, and the very first flower picture, and petals)  To follow her adventures visit : www.thenikiverse.blogspot.com

Thursday, February 2, 2012

Homemade Pita Bread


As of lunch today, I have made these successfully twice, so it is time to share.

Now, I am a bad blogger in that I forgot to take pictures of the first few steps.  So let's pretend that there is a picture of the ingredients
HERE!

1 tablespoon yeast


1 ¼ cup warm water

1 teaspoon salt

3- 3 ½ cups flour


Dissolve yeast in water for about 5 minutes in the bowl of an electric mixer. Add salt and 1 ½ cups flour and with the dough hook, beat to make a batter. Add additional flour until a rough, shaggy mass is formed. Knead 8 minutes until dough is smooth and elastic. Add more flour if it is too sticky.

And as it is mixing up, what "shaggy dough" looks like


HERE: Shaggy

Run it in the mixer for 8 minutes to knead it.  (or knead it by hand for 8 minutes-your choice)

Turn out on a floured (clean) counter.  And pull into 6-10 balls. 

Roll out to circles about 1/4 inch thick and let sit for 30 minutes.


In the last 5 minutes of the dough resting, it will get a bit puffy.  Heat your oven to 425*


Flip your round pita upside down on cookie sheets or pizza pans, whatever you can find.  Put them in the oven and watch for the first 5 minutes.  OK, you don't HAVE to watch them, but it's a kick to watch them puff up like balloons!!


Bake for 15-20 minutes. 


Take out and make pita pocket sandwiches (I filled ours with chicken salad with grapes), or use with dip.  If you have any that make it to a day old, you can use them to make awesome little pita pizzas!
This picture taken by Boy

Saturday, September 17, 2011

Sweet and Savory Yellow Tomato & Basil Jam

makes 3-5 pints

4 pounds yellow tomatoes
3 cups granulated sugar
1/2 cup lemon juice
1/2 cup roughly chopped basil

Cut cherry yellow tomatoes in half, or, if using larger yellow tomatoes, chop them into smallish pieces.  I actually boiled my cherry tomatoes and put them through the food mill to get the skins off.  I also blanched and peeled the tomatoes.  You can leave them on if you prefer.  I also used a few of my "hillbilly Mr. Stripey" tomatoes, so I have a few spots of red in my jam.
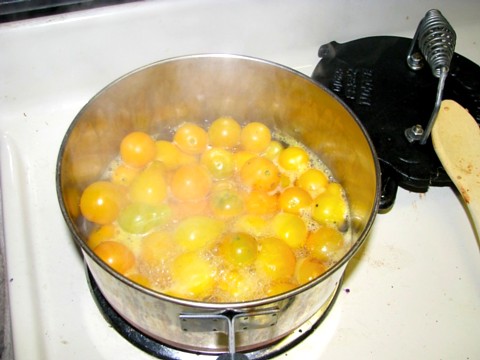
Yellow Cherry Tomatoes (Sun Gold & Pear)
Yes, I should have wiped the counter before taking the picture...but I'm all about keeping it real!

 Combine chopped tomatoes with sugar in a large, non-reactive pot and stir. Let sit for at least one hour, or until the tomatoes release their juice.

When ready to cook, prep canning pot and jars and place jam pot over high heat. Add lemon juice and bring to a boil.

Cook at a boil for 40-45 minutes, stirring frequently, until the tomatoes have softened and the syrup has gotten thick.  Because I used cherry tomatoes, I had a bit more water and had to cook for about an hour and then it still was somewhat runny.  Once you’re satisfied with the set, remove the pot from the heat and stir in  chopped basil.
You should pick the basil, wash, and tear it up (or cut it) BEFORE you get to this part of the recipe!

Pour jam into prepared jars. Wipe rims, apply lids and rings. Process jars in a boiling water bath canner for 10 minutes.
Use caution, as you can see from the steam, it is hot...and if you are multitasking and, say, talking on the phone at the same time.....I'm just saying!


When time is up, remove jars from pot and let them cool on a kitchen towel. When jars are cool enough to handle, remove rings and test seals. Place any unsealed jars in the refrigerator and use promptly. All sealed jars can be stored in a cool, dark place for up to 1 year.

Aren't they lovely?  And the other red tomatoes I canned today as a backdrop.

Thursday, July 21, 2011

Zucchini Spread

Everyone I know is currently overrun with zucchini!  This is the first year I have had this "problem"  I have always lamented that "for once" I would like to be the one with WAAAAY too much zucchini...rather than having to go buy some.  Well, God answered my plea and we have zucchini everywhere!  I grew both green zucchini and the golden variety.  So in searching for fun ways to eat the stuff (we love it grilled, but after a week, we need to try something new) I've found some outstanding recipes.  Of course, I usually take recipes as a guideline...so my variations are somewhat different.


3 pounds zucchini, cut into a 1/2 inch cubes
2 tablespoons olive oil
2 tablespoon butter
5 garlic cloves, gently smashed
1/2 teaspoon sea salt
4-5 turns of a pepper grinder

Place a large, heavy skillet over medium heat. Add olive oil and butter and allow them to melt together. Roughly chop the smashed garlic and add it to the pan. Add the zucchini cubes. Cook for 15-20 minutes, until the zucchini has begun to soften. Strip the thyme leaves off their stems and add them to the skillet
.
Reduce the heat and continue to cook, stirring often. The goal is to melt the zucchini into a spreadable paste. The goal is to cook the liquid out of the zucchini and intensify the flavors without reducing it to total mush. If at any point, the zucchini starts to brown, add a splash of water (or white wine if you happen to have an open bottle-I don't know how it happened...I didn't have any wine to add) and reduce the heat a bit more.

Total cooking time should be right around an hour. Three pounds of zucchini typically yields around two cups of spread.

Once cooked, the spread will last up to one week in the fridge. Serve on toasted baguette rounds or crackers.

Friday, July 2, 2010

Black Raspberry Jelly Tutorial

So...I've been told I need to do a tutorial on here...so here is it.  My favorite jelly is black raspberry, but it is labor intensive.

First pick the berries fresh from a local farm (but not so local that you don't get lost for at least an hour.)

Fill your helper up with fresh berries (notice the blue lips)


Assemble your supplies....

Premeasure your sugar according to your pectin because when it comes time to use it, you have to move fast.

Now, if you are like me, you rather not have the hard little seeds (thus jelly not jam)  This is the labor intensive part.  First mash up the berries with a potato masher and warm on the stove to release the juice. 

Call your mom to make sure you are doing it right.
"Hi Mom!  Thanks for the cheerleading!!"

Put the crushed berries into cheesecloth about 1 cup at a time and squeeze out the juice into a bowl.  Empty the seeds and pulp into another bowl...Repeat...
Repeat...Repeat....Repeat....
Use gloves unless you are planning on painting your fingernails later to cover up the black stain. Seriously, ask me how I know.....I KNOW!


Seeds & pulp on left, juice on the right.

Good job...take a break.
We took our break at the Alum Creek Beach.

More on that in another post!!

Back to work...

Stir the package of pectin into the measured juice...
And a pat of butter to keep it from foaming over.
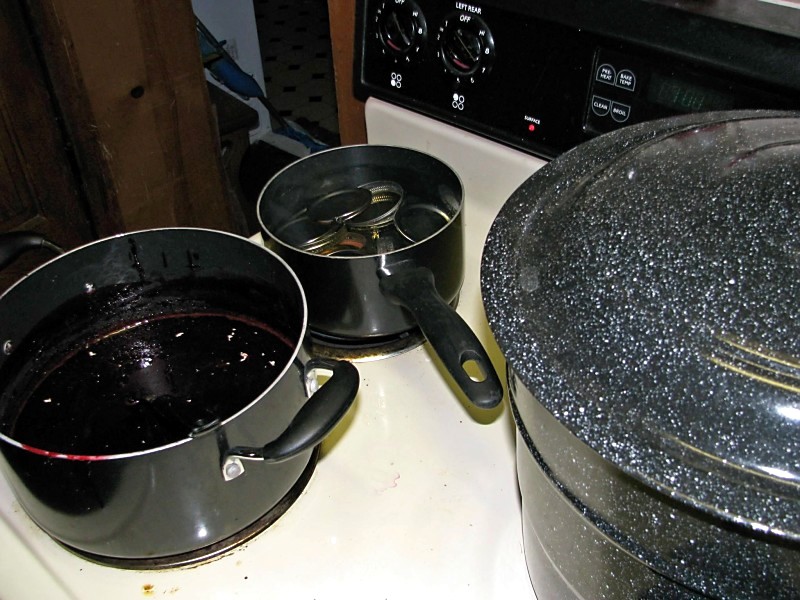
Get your canner boiling as it takes awhile. Also boil water, and turn off before putting in your rings and lids.

After your juice and pectin comes to a rolling boil (cannot be stirred down), dump in ALL of your measured sugar.  Stir constantly and bring back to a rolling boil. 
Once it starts to boil and cannot be stirred down start timing.  You want it to boil for exactly 1 minute.

Ladle into warm glass jelly jars. 
We prefer the 8 oz size, but you could use 16 oz.
Work quickly, it sets up quick.

Pardon the mess all around.
The pepsi bottle is actually for the rabbits.
(Frozen water keeps em cool on hot days.)

Load your jars into the canner.

Process for 5-10 minutes
(as stated on your pectin recipe-for us it was 5 minutes after it came back up to a boil).

Unload your jars onto a dishcloth.  Make sure they are not touching each other. 
Enjoy the *PING* and the seal sets. 
The quart basket on the right will make two batches or about 17 jars of jelly.

Then have "quality control" check the taste and consistancy!


YUM!  Enjoy!